Calibrating a grinder so that you can pull a relatively regular espresso should be done as often as possible. Depending on the grinder, coffee and the espresso machine, calibration should be done at least three times a day, ideally. Before the morning rush, before the lunch rush and before the evening rush are good times. It should also be done as a roasted coffee ages, when the coffee blend or origin changes, and also if it is a new roast.
However, this is in an ideal world. If any espresso station aims to calibrate at least once a week, this will go a long way to improve the quality of the espresso being pulled.
Before you begin
Before you start, this is what you need:
- The coffee with which you’re calibrating the espresso grinder
- Assuming it is a doserless grinder with a timer, then an understanding of the grinder, viz. how to adjust its grind size from coarse to fine, and how to adjust the timer setting (get the manual from the internet if required).
- A scale that can fit the filter basket that is being used in the espresso machine. Ideally, one that can fit the portafilter as well.
- If possible, a second scale to measure the dose of the brewed cup. You can use one scale, but this takes longer. Espresso scales are best for this.
- A timer (a phone is fine, usually).
- You also need to understand the capacity of your filter basket. If it is a calibrated basket, it will have recommended grams written on the side of the basket (or a code you can look up). If not, then you need to assume that it is an un-calibrated basket. This type of basket double basket takes 14g and a single takes 7g. A double is about a thumb knuckle’s depth from top to bottom. A single is either shallower, or has two parts in the basket — one for the grinds, and one for stopping the tamper. This is a generalisation, however. It is best to use a calibrated or precision basket like a Strada, VST or IMS for accuracy of extraction.
- Preferably standard items like cups and tamper, a mat if possible etc.
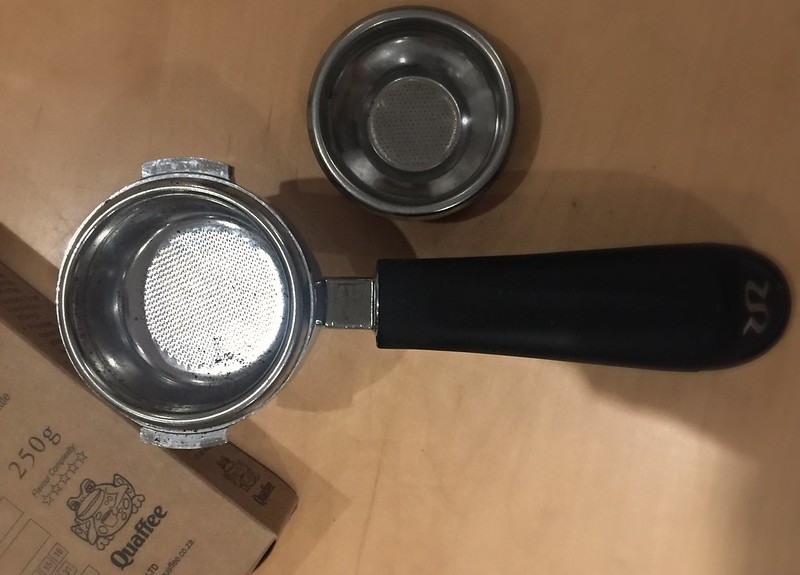
Portafilter with an 18g IMS calibrated basket and a 7g or single uncalibrated basket
Setup of grind size
Once you have all your goodies, set up your grind for fineness or coarseness.
- Using your grinder, grind a portion of coffee at least at the dose size your basket recommends. You can do this into the basket in the portafilter (if your scale can take both), or you can do this into the basket or a separate container.
- After taring your scale, adjust the grams (with a spoon) within an accuracy of about .1g or 100mg.
- Tamp the coffee. Get ready to pull a shot.
- Place the scale on the espresso machine, tare it with the cup (or as the scale recommends) and then insert the portafilter and pull an espresso. You are aiming to pull between 1.5 times the dose and 2 times the dose, in 25 seconds ideally, not shorter than 15 seconds, and not longer than 45 seconds. Anything over 60 seconds adds no value to the brew.
- You want to see slow infusion. Within 6 seconds, the coffee should start running out of the portafilter into the cup.
- If nothing comes out after 10 seconds, your grind is too fine.
- If it runs too quickly, your grind is too coarse.
- What is ideal is for the brew to begin slowly, then accelerate, a little, as it extracts, creating almost a gentle “S”, what some call mouse tails.
- If you nailed it, feel free to try it again. Otherwise, continue to Setup of timer on grinder. If not, adjust the grinder (grind out remainders from the previous grind to avoid mixing) and repeat the above steps until you are happy. This requires patience and concentration.
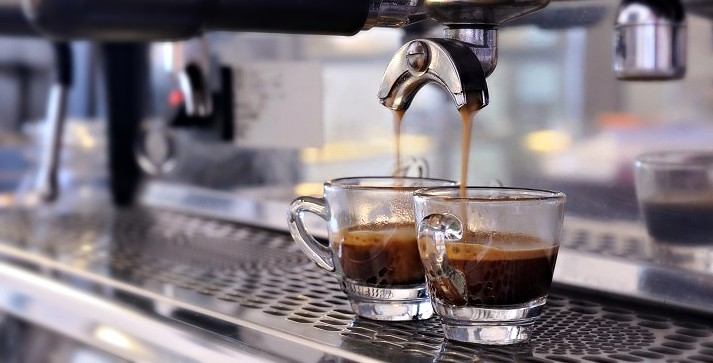
Example of mouse tails in espresso
Setup of timer on the grinder
Now that you have your grind size setup, you need to set the timer on the grinder to make sure it is dosing the correct grams as per your calibration. You may have to check your manual.
Some grinders are not as precise as others and dose more or less. As long as it is within 100mg, you can settle for this. Increase the timer to increase the dose and decrease it to decrease the dose. Save between settings.
Once set, check the espresso again. Remember the ideal dose of the final espresso and timing.
Some notes
This is a basic guide, and it does not cover the various tweaks you can make to extract more or less. It does not cover the solubility percentage or ideal end dose. You can read more about this on the Barista hustle blog.
More info:
- Barista Hustle – Espresso putting it all together
- Quaffee’s Espresso play list on YouTube.
- Brew variables explained.