
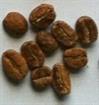
The coffee roasting process and our approach to it varies almost every quarter. As we gain more and more experience. Since at Quaffee™ we roast each batch in a very hands-on manner, our experience changes the subtleties of our roasting. That said our basic roasting knowledge is based on we received direct from Steven Diedrich (inventor of the Diedrich roaster). Then our own personal experience with our coffees we source allows us to develop each profile. Add to that, the fact that we continually read articles or books published on the art of coffee roasting.
Notes about our philosophy to roasting
Although what follows is a general description of the coffee roasting process, it is important to note the actual roasting process we follow is part of our (and in fact most roasters) uniqueness. Each roaster who is passionate about the end result will have their own unique belief about roasting. Driven by the market they serve, the beans they source and their personal tastes.
About our Diedrichs
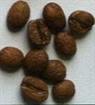
All fine food and drink are affected by how they are prepared. Accordingly, this is why we ensure all our beans are roasted to a profile. Each profile is carefully identified by iterative tasting and changes. Add to that we use, what we consider, to be one of the finest coffee roasters (a Diedrich IR-12 and IR-2.5). These roasters use only clean hot air. The roaster uses a ceramic plate that is heated in a contained system so that only clean infrared heated air is radiated into the roasting barrel.
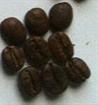
Roast progresses at a controlled pace, ensuring that the roast level we believe to have identified as the most scrumptious is reached. Beans are emptied into an air cooling bin, and the roast is arrested. Finally, we allow the beans to cool in the cooling bin naturally.
A rough guide to roasting
Coffee roasting goes through a number of phases. Although there are many phases, there are some that are more obvious to identify and control. We look at the roast process as containing the following phases:
- Charge and turning point phase
- Soaking, initial drying phase or the start of endothermic
- Final drying phase and the start of Maillard stage
- Yellowing phase to brown
- Exothermic Phase
- 1st crack
- 2nd crack
- Dump or Drop
There are many other roasters that may dispute these stages, and perhaps may expand this list or more likely reduce it to probably 4 stages:
- charge-soak,
- yellow browning,
- 1st (and 2nd crack), and
- development phase.
Charge and turning point phase
The charge temperature is the temperature you start the roast or charge the roaster at when introducing the beans. The turning point temperature is the lowest temperature that the beans reach before the temperature increases. This temperature signifies that the beans that have been introduced to the roaster have equalized to the roasting environmental temperature.
Determine charge temperature
The most important thing about this stage is that you need to decide on your charge temperature. To determine your charge temperature you need to consider the following:
- Ambient Temperature and Humidity. The rule of thumb here is that the lower the ambient temperature and the higher the humidity the higher your charge temperature is.
- Quantity of coffee being roasted in relation to the maximum load of the roaster. The smaller the load the lower the charge temperature. Typically a fuller load should have a higher charge temperature.
- How your particular roaster reacts when the coffee is introduced to the roaster, this comes from experience.
- The coffee you are roasting, the higher grown the harder the bean the higher the charge temperature, low grown softer coffees you can reduce the charge temperature.
- The current moisture content of the green unroasted bean.
Determining when to add flame
Once the roasting process has started you need to look at when you introduce flame to the green, if at all. Sometimes called the soaking stage, and it determines how long the coffee is given to absorb the roasters environmental heat. Once again there are factors that determine this:
- The desired roast profile (when do you want the Maillard reaction to start).
- What is your target for the bump temperature/time, kick, first crack, second crack and dump temperature/time.
- The load dropped into the roaster as a percentage of the maximum load, the smaller the load the lower the flame normally. For very small loads you may not even need flame.
- The age of the coffee/moisture content.
Typically turning point temperature is normally at around 1 minute 30 seconds. From then you need to look at ramp or change of temperature as a guide.
Note: to accentuate the bright citrus flavours that can exist in some coffees introduction of flame early typically pronounces this. Manipulating the charge temp can also have this effect.
Initial drying phase or the start of endothermic
This part of the roast is from the turning point to what we call the bump temperature. It is called this since we are bumping it up or ramping it up quickly. We call it bump since the S curve (i.e. the curve of bean temperature over the time of the roast) may look like a bump is forming at this point. Do not get bump here and dump later mixed up
A general rule of thumb is that for lowland grown coffees there is no bump temperature but for shade and highland grown coffee there a dump temperature seems to better expose the subtle aromas and flavours.
During this phase you want to look for the following:
- Temperature the turning point started (between 150 and 180°F or 65 to 80°C is best);
- For highland and shade-grown coffees: the rate of change in temperature should peak at between 30 and 40°F (15 to 20 ° C) per minute and to do so before;
- For the lowland grown coffees or for coffees that you find that the subtle flavours are destroyed by the bump, the change in temperature should hover below 20°F (10°C)
- The dump typically is complete at between 220 and 240°F (105 and 115°C) so that the bump happens then.
The bump is where the ramp temperature drops off a bit so that you can start the final drying stage of the coffee, and control the mallard reaction in a more acute manner.
Final drying phase and the start of Maillard stage
After 240°F or 116°C until the yellow browning stage, you should be targeting a change in temp (or ramp) to be as consistent as possible, or even decrease slightly at a regular rate. This allows for better control of the Maillard reaction to come. In turn, this will convert the sugars to caramels ensuring the coffee evenly brown and prevent tipping and scorching.
During this stage, the temperature ramp should be what was determined optimal for the roast profile that you identified for the coffee taste preferred. Sweeter coffees have a higher decrease in ramp here (but not too high), and more savoury coffee prefers a slower ramp.
During this stage, your change in temperature should be no higher than 40°F (about 22°C) per minute or lower than 12°F (about 6°C). Since too high and flavours are burnt off, and you get spotting on the coffee bean and too low and the coffee flavour does not fully develop and becomes baked. Consequently, you see the coffee beans changing colour (this is around 320°F or 160°C)
Yellowing phase to brown and start of Exothermic
It is during this phase that the complex flavours start to develop, so it is important to sustain your ramp or change in temperature to a consistent level, so that from yellow browning to by around 370 °F (188 °C) you can kick start the exothermic phase and get into 1st crack using the coffee’s exothermic energy that it has built up as part of the roast.
So in this stage, it is important to control the flame so that the change in temperature is within 1 and 2 °F or °C of the last change. So if you want a change in temperature of say 18 °F per minute, you must control the flame so that the change in temperature is as close to 18 °F per minute for the time you spend in this stage. Or as close to that as possible as you can.
Exothermic stage
At between 330 °F (or 166 °C) and 370 °F (or 180 °C) you should change your airflow to full, for two reasons:
- For full flavours development and getting the coffee to properly start the Exothermic stage,
- To get as much chaff off as possible of the coffee and through the system.
As the temperature rises in this stage, the coffee will become caramel in colour and start browning, check for how the bean is developing using the roasted coffee sampler. Parts of the bean will start expanding while others will look a little wrinkled, but as it gets to first crack these wrinkles should start disappearing. Using the test scoop to test this is recommended, especially when learning how to roast.
First crack
At between 370 °F (or 188 °C) and 400 °F (or 205 °C) first crack starts and will continue until all the beans have gone through this stage. In this stage, the gasses and water in the bean are forced to the surface and escape with a POP noise as you hear with Popcorn. The stage starts slowly like what happens with popcorn (the process is similar) and then as more and more of the beans go through this stage there is a symphony of first cracks, then there is a settling down as the last ones go through the process.
The methodology of flame control in this stage depends on the profile you have found works best for your tastes. Some people drop the flame to half or even no flame to extend this phase. Some people may even drop the coffee at this point making it like a Scandinavian roast.
That said we believe this is the sight and sound stage of coffee development, we would recommend sampling the coffee regularly and paying attention to temperature becomes secondary, look at the colour the development and the aroma that is coming of the bean. If you find the coffee is struggling to get to the end of first crack it may mean that the exothermic reaction has stalled and needs a push.
But pay attention at this point.
Note: We have found that to preserve citrus flavours in a coffee it is a good idea to accelerate into first crack and have a short development time (time from first crack to drop), While for coffees showing the need to express the heavier sugars like caramel and molasses almost killing the flame into first crack assists here. Going halfway seems the most common approach for the coffees with berry, malic and nutty tastes.
Second crack
If you are going anywhere near second crack then you are primarily interested in producing heavier charcoal and cigar type tastes in the coffee. To paraphrase James Hoffman: “The quality of the coffee here is not relevant since the dominant tastes being introduced at this point is due to the charging of the coffee rather than the intrinsic flavours in the coffee”. This is a classic old-school way of roasting coffee.
If you have not dumped the coffee then the next stage is second crack. After first crack for about 6 °F (or 3 °C) the coffee gets ready for the next crack.
It is at this stage that normally we recommend dumping most coffees. Thus ensuring flavour remains intact and not affected by the burning of the caramelised sugars. This would be the result of extending the Maillard stage. As second crack starts, decide how far in you want to extend the roast. The further you go into second crack the more the coffee gets charred. As the coffee goes further into second crack the sugar browning stage starts entering its final stage. Coffee is not dumped at this point, will enter into a dry distillation stage. In this state, more medicinal flavours are exposed. Taking the coffee too far will cause it to catch alight – FIRE.
Dump (or Drop)
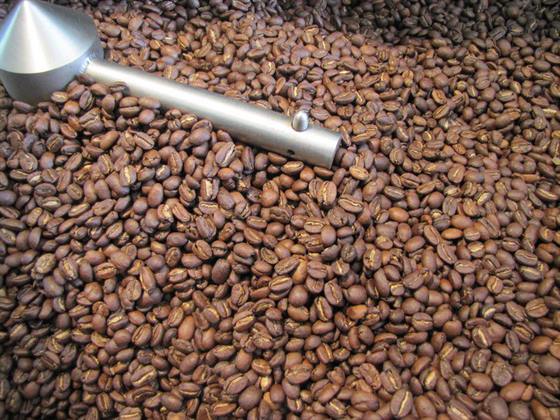
As soon as you have determined that development and colour of the coffee to be to your liking then dump the coffee into the cooling bin. Set flame to pilot, airflow through the cooling bin.
At this point agitation of the coffee helps the remaining chaff and smoke to be drawn through the cooling bin. However, agitation will delay the arresting of the exothermic reaction. Once all the heat of the coffee has been dissipated, inspect the beans for any beans with defects or beans that have not become fully developed. Also, look for stone or other strange objects at this point.
Place coffee in a receptacle once cool. Then weigh to check loss.
More on coffee roasting
There are many other places to read up about roasting, and creating profiles, here is some further reading:

Hello y’all! Nice article. There’s a few spots where you use “dump” instead of “bump” and it’s a bit confusing. Can you change dump to drop? Problem solved!
Also, care to share any basic temp parameters for charge and dump/drop? I just bought an IR-12 and am curious how other folk manage their batches.
Thanks!
David N
Will take a re-read to clarify, we normally us the word bump to mean adding a lot of flame quickly, this can cuase what looks like a dump in the S curve. Give us an idea of the coffee you are roasting and we can post some numbers. For a highland ground quality Colombian we normally charge aroudn 390F and drop around 408F. But every roaster is different.